Installation and Setup
Voice and Video with Individuals
Call Queens Associates and Personal Contacts
Conference Calls, Collaboration, and Video Meetings
Schedule a Meeting from Microsoft Outlook
Join a Scheduled Meeting from Microsoft Outlook
Messaging
Fax
Sign into the App
All required apps have been preinstalled on your device by IT Services.
Double click on the RingCentral icon on your desktop, as shown below.

Enter your @Queens.edu email address and then tap Next.
Enter your password and then click Sign In.
Click to return to the Table of Contents
Call Queens Associates and Personal Contacts
Click on Contact.

From here you can scroll through or Search your contacts. Left click on the contact you wish to call.

Clicking on the contact’s name will open the collaboration screen.

Clicking on the icon will connect you via audio only. Note: Screen sharing is not available during an audio only call.

Click to return to the Table of Contents
Dial a Phone Number
Click on CALL.

If prompted to Register Address for Emergency Calls, click Confirm.
Note: It’s recommended that calls to 911 be placed from your desk or cellular phone.

Left click on Type a name…. enter the 10-digit phone number and then tap the call button (green circle.)

Click to return to the Table of Contents
Schedule a Meeting from Microsoft Outlook
Launch Microsoft Outlook on your local PC, click on Calendar, and then click on Schedule a Meeting.

Select your desired meeting options, and then click Continue.
Recommendations:
Video (when joining a meeting:) Off. Video can be enabled after joining the meeting.
Audio Options: Telephone and Internet Audio
Require a meeting password: None, unless you require a secure meeting.

Enter the internal and/or external recipients, change the day and time as required, and then click Send.

Check your calendar to confirm your meeting has been successfully scheduled.

Click to return to the Table of Contents
Join a Scheduled Meeting from Microsoft Outlook
Launch Microsoft Outlook on your local PC and then click on Calendar.
Locate the meeting you’d like to attend and open it.

Click on the Join from PC, Mac… link to join the meeting using the full collaborative experience. Note: Using the link to join is the preferred method. Your camera is off by default.

If you have a headset, click Join with Computer Audio. Otherwise, dial-in by phone.

Click to return to the Table of Contents
Meeting Tips and Tricks
Once you’ve joined the meeting, you’ll see the control bar shown below.
![]()
Click Start Video to turn on your video camera. Note: Joining via video (camera icon) is the preferred method. Your camera is off by default.
Click Invite to invite additional participants.
Click Manage Participants for options to mute or unmute participants.
Click Chat to message participants. Select Everyone or an individual participant, enter a message, and then press enter to send.
Click Sharing to reveal the sharing options. Note: Sharing your screen allows all meeting participants to see your screen until you stop sharing.
Choose the screen or app you want to display to the meeting participants and then click Share.

When you’re ready to leave the meeting, click End Meeting. Note: If you’re the host of the meeting, clicking End Meeting for All removes all participants.
Click to return to the Table of Contents
Send an Instant Message
Click on Message.

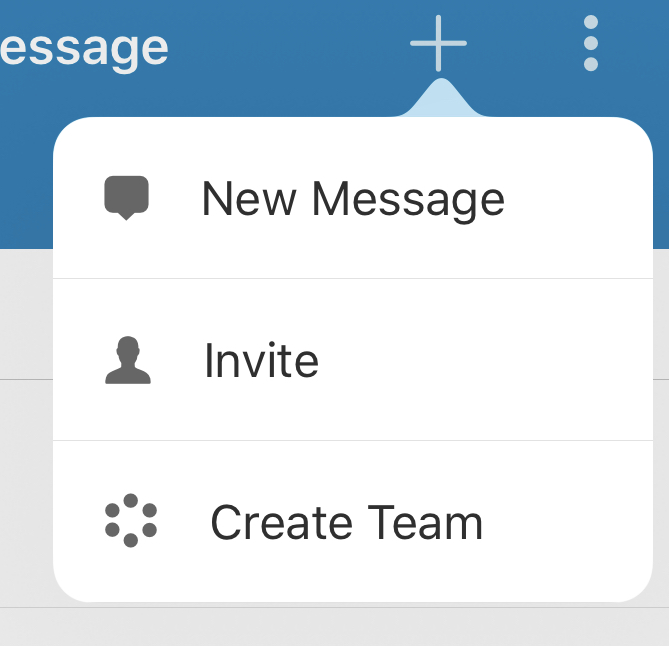
Under Direct messages, click on an existing chat or click the + to message a new recipient.
 or
or 
Begin entering the name or email address of the person you want to message. The app will first attempt to match the info to your contacts. If the recipient isn’t a contact, continue entering their email address.
When done, click Continue. Note: If the recipient is external, they’ll receive an invite to join the conversation.

Enter your message, attach a File or Photo, and then press enter to send. Note: Not all recipients will support sending and receiving files and photos.

Click to return to the Table of Contents
Send a Text Message
Click the + sign in the upper right hand corner of your screen and then click New Text.

Begin entering the 10-digit phone number you want to text. The app will first attempt to match the number to your contacts. If the recipient isn’t a contact, continue entering their number. When done, click Continue.
Enter your message, attach a File or Photo, and then press enter to send. Note: Not all recipients will support sending and receiving files and photos.

Click to return to the Table of Contents
Send a Fax
Left click on CALL.

Click on Fax and then Compose Fax.

Begin entering the 10-digit phone number you want to text. The app will first attempt to match the number to your contacts. If the recipient isn’t a contact, continue entering their number.
Enter Queens University of Charlotte for Company name.
Enter Cover page notes, if required.
Drag and drop all required attachments, and then click Send.

If successful, you’ll see a Fax Successful message and also receive a Fax Results message via email.


Comments