Installation and Setup
Voice and Video with Individuals
Call Queens Associates and Personal Contacts
Conference Calls, Collaboration, and Video Meetings
Messaging
Fax
Install and Sign into the App
- Open the App Store and search for RingCentral.
- Locate the app shown below and tap Install.

- Once installed, tap the RingCentral app as shown below.

- Tap Sign in.

- Enter your @Queens.edu email address and then tap Next.

- Enter your password and then tap Sign In.

- Click Allow to enable Notifications.

- Click OK to access your Contacts.

- Click OK to allow access to your Microphone.

- Click OK, if you’d like to use the app with Siri.

Click to return to the Table of Contents
Call Queens Associates and Personal Contacts
- Tap Contacts. If prompted to Allow Access, click Yes.
-

- Tap Company to view your Queens’ contacts.

- Locate the Contact you’d like to call and tap on their name.

- From here you can contact the individual by sending a direct message, initiating a voice or video call, or creating a chat group.

Click to return to the Table of Contents
Dial a Phone Number
- Tap Phone. If prompted to Allow Access, click Yes.

- Tap the dots to reveal the dial pad.

- Enter the 10-digit phone number and then tap the call button (green circle.)

Click to return to the Table of Contents
Schedule a Meeting
- Tap Meetings and then tap Schedule.

- Enter the meeting details, select your desired options, and then tap Next.

- Tap Invitees to add participants.

- Start typing the first name of the participant or enter their mail address. Once you’ve added all required participants, tap Done.

- Tap Add invitees to add more participants or tap < New Event to go back to your event.

- Tap Add to schedule your meeting.

Click to return to the Table of Contents
Join a Scheduled Meeting
- Tap Meetings.

- The icon next to the meeting’s title shows whether it’s video capable or audio only. Tap the camera icon or phone icon to join the meeting. Note: Joining via video (camera icon) is the preferred method. Your camera is off by default. Tap the meeting’s title to view details about the meeting.

Click to return to the Table of Contents
Meeting Tips and Tricks
Once you’ve joined the meeting, you’ll see the screen on the left. Swiping the main screen right enables Safe Driving Mode, which mutes your mic and allows you to quickly leave the meeting. Tapping the main screen reveals the menu.
Main Screen Safe Safe Driving Mode Main Screen Menu


From the menu, you can mute and unmute your mic, start and stop your video, share content, and view and chat with participants. Tap the ... to reveal more options, including raise your hand.

Tap Sharing to reveal the sharing options. Note: Sharing your screen allows all meeting participants to see your screen until you stop sharing.

Tap Participants to view and message current meeting participants, and to invite additional participants.

Tap Chat to message everyone or an individual. Tap Invite to add participants to the meeting.

From the Chat screen, select Everyone or an individual participant, enter a message, and then tap Send.

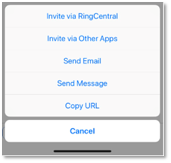
Tap Invite to add participants.

From here, you have multiple options to add participants.
Click to return to the Table of Contents
Send an Instant Message
- Tap Message.

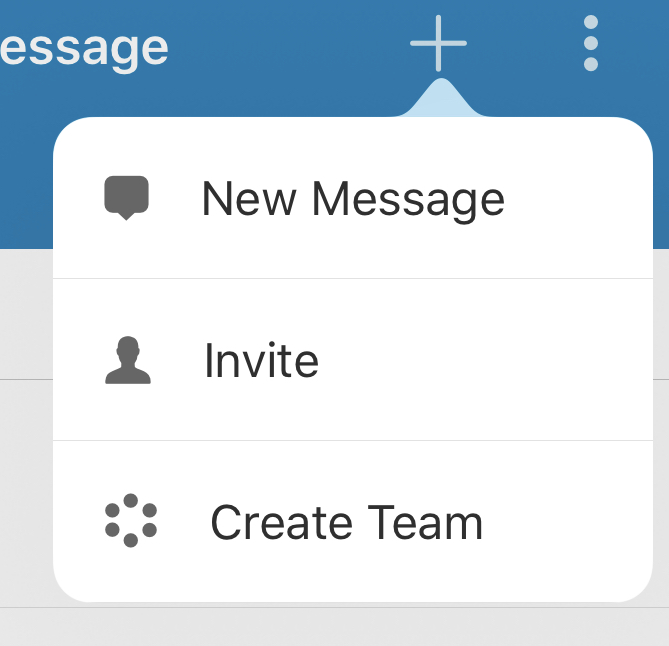
- Tap the + sign in the upper right hand corner of your screen and then tap New Message.
- Scroll through your contacts or start entering their name, then tap the contact you wish to message.
- Enter your message and then tap send.
Click to return to the Table of Contents
Send a Text Message
- Tap Call. If prompted to Allow Access, click Yes.

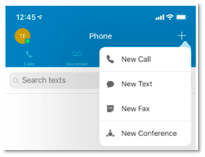
- Tap the + sign in the upper right hand corner of your screen and then tap New Text.
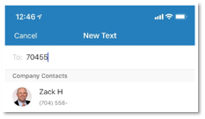
- Begin entering the 10-digit phone number you want to text. The app will first attempt to match the number to your contacts. If the recipient isn’t a contact, continue entering their number.

- Enter your message, tap the + sign to attach a File or Photo, and then tap the send icon (paper airplane.) Note: Not all recipients will support sending and receiving files and photos.

Click to return to the Table of Contents
Send a Fax
- Tap Call. If prompted to Allow Access, click Yes.

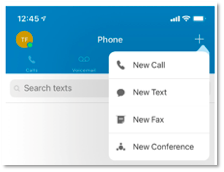
- Tap the + sign in the upper right hand corner of your screen and then tap New Fax.
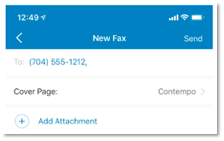
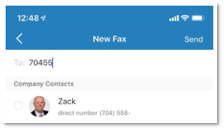
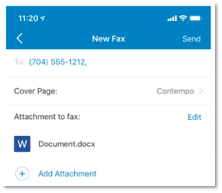
- Begin entering the 10-digit phone number you want to text. The app will first attempt to match the number to your contacts. If the recipient isn’t a contact, continue entering their number. Once you’ve selected the appropriate contact or entered the 10-digit number, tap “+ Add Attachment.”
- Tap Attach File or Attach Photos.

- Browse your iPad or iPhone to locate the item you’d like to send, and then tap on it.
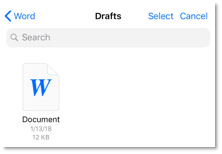
- Tap “+ Add Attachment” to attach more items or tap Send.
 Click to return to the Table of Contents

Comments