Students: IT has implemented new printing devices and software on the entire campus. Your personal computer may have the old print queue installed named "Follow-Me-Printer on appprint01" which should be removed.
The new print queue is named "Follow-Me-Printer on appprint02" and can be installed using the directions found HERE after you have completed the removal instructions.
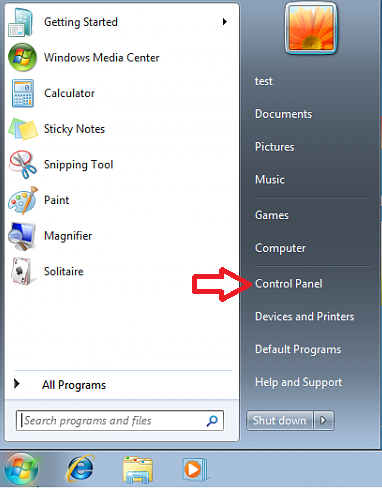
Removing Printer Connection Windows 7
1.) Click the start button  on the bottom left of your computer screen
2.) Click Control Panel on the right hand side of the start menu
3.) In control panel, click View Devices and Printers
4.) Right click on the Follow-Me-Printer on appprint01 and select Remove Device
Removing Printer Connection Windows 8, 10
1.) In your Windows 10 search bar type Printers and hit enter. If you do not see a search bar, right click on the Windows start icon and select Search then proceed with typing Printers followed by enter.
2.) In the Add Printers & Scanners window you will see the Follow-Me-Printer on appprint01 listed. Select the printer and click the remove device button.

Comments