
The following applies to both Adobe Acrobat and Adobe Reader. Attached to this article is a sample form with a signature field.
- Open the document you wish to sign and click on the signature field. If the document has been set up properly there will be yellow box saying ‘unsigned signature field’ when hovering the mouse over the field.
 For more information on creating fillable forms please see the following article: https://helpx.adobe.com/acrobat/how-to/convert-word-excel-paper-pdf-forms.html?set=acrobat--fundamentals--pdf-forms
 - A box will pop up asking to either use an existing ID or create another one.
- If you already have a digital ID click ‘next’, then ‘sign’ on the following screen. You’ll be prompted to save a copy of your signed document.
- Click ‘next’ and continue to step 3 if you’re creating a new ID.
- Select ‘Windows Certificate Store’ and click ‘next’.
- Enter your information and click ‘finish’.
- Now you’ll be taken to the standard ‘sign document’ screen. Your new signature is automatically selected.
- Find and click the drop down menu next to ‘appearance’. Select ‘create new appearance’.
- The next step is to add an image of your signature. You’ll need to already have this saved on your computer as an image file. You can create this file by signing a piece of paper, then scanning and emailing it to yourself. If you’re satisfied with the default settings and don’t wish to do this, then skip to step 13.
- Locate the ‘configure graphic’ section in the middle of the window and click the ‘imported graphic’ option. Next click the ‘file’ button.
- Another window will pop up. Click on ‘browse’.
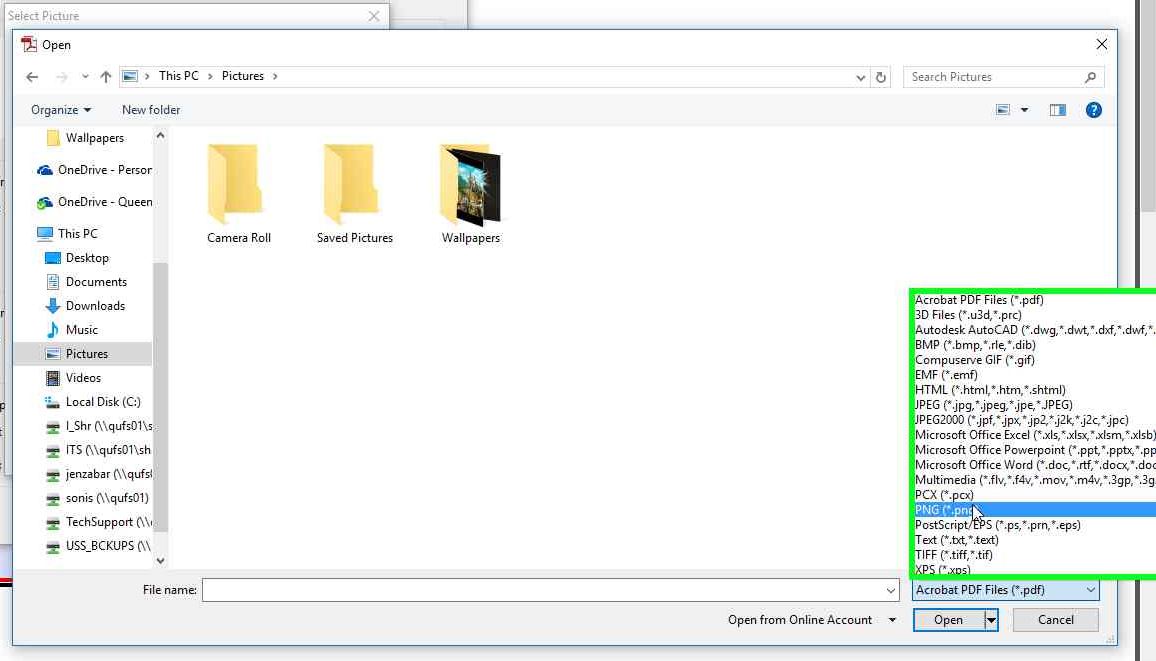
- Locate the image file you want to use. Make sure that you click on the drop-down menu on the right and change the file type to the same as the image you’re looking for. Otherwise you will not see your file even though it’s saved on your computer.
- Select your file and click ‘open’, then click ‘ok’.
- Once you’re satisfied with the other options in the signature appearance window click ‘ok’ again. You’ll then be taken back to the sign document screen.
- If you don’t need anyone else to sign or modify the document then check the box next to ‘lock document after signing’. Click ‘sign’.
- Another window will pop up prompting you to save your now signed document.
Remove a digital ID
- In the top left corner of the screen click ‘edit’ then ‘preferences’.
- Choose ‘signatures’ from the categories on the left.
- Find the ‘identities and trust certificates’ section and click ‘more’.
- Another window will pop up showing you all the digital IDs you currently have. Highlight the one you want to delete then click the ‘remove ID’ button.
Comments