This is a Quick help guide for using SharePoint at Queens. Please select the buttons below to expand the section for more information.
What is SharePoint?
SharePoint is a platform that helps end users collaborate, communicate, and organize information more effectively. It allows users to share and work on documents with colleagues, ensuring everyone has access to the most up-to-date information. This promotes teamwork and saves time.
SharePoint enables seamless communication through features like discussion boards and announcements. Users can engage in conversations, gather feedback, and stay informed about important updates, improving communication within the organization.
SharePoint simplifies information discovery with its powerful search capabilities. Users can quickly find documents, files, and other content, saving time and increasing productivity.
In summary, SharePoint benefits end users by facilitating collaboration, enhancing communication, and enabling efficient information retrieval, ultimately improving their work processes and productivity.
SharePoint vs OneDrive
-
SharePoint:
- SharePoint is designed for team collaboration and content management, providing a centralized platform for sharing and organizing files, documents, and resources among multiple users or teams.
- It allows for the creation of team sites, which offer features like document libraries, lists, calendars, and discussion boards, enabling collaborative workspaces for projects, departments, or committees.
- SharePoint emphasizes broader content management capabilities, such as version control, metadata, workflows, and extensive customization options.
-
OneDrive:
- OneDrive is a personal cloud storage service that allows individual users to store and sync their files across multiple devices, providing easy access to their documents from anywhere.
- It focuses on individual file management, enabling users to organize, share, and collaborate on files with others, but on a more personal scale compared to SharePoint.
- OneDrive emphasizes seamless integration with Microsoft Office applications, making it convenient for individual users to create, edit, and save documents directly from their desktop or mobile devices.
-
Collaboration scope:
- SharePoint is ideal for collaboration on a larger scale, supporting multiple teams, departments, or even the entire institution. It facilitates shared workspaces, document co-authoring, and centralized document management.
- OneDrive, on the other hand, is geared towards personal productivity and collaboration with a smaller group of individuals, such as sharing files with colleagues or collaborating on documents with a few teammates.
Sign in to SharePoint
Sign in to SharePoint
SharePoint is a browser-based app that you connect to through your web browser, like so:
-
Go to mail.queens.edu and log in with your Queens credentials.
-
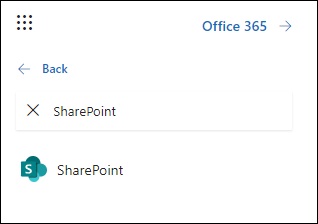
In the upper left corner of the window, select the app launcher
 > All apps > SharePoint
Tip: If you don't see the SharePoint app under All apps, use the Search box near the top of the window to search for SharePoint.

How to Search
How to search
-
Type into the
 Search box located in the middle of the title bar at the top of the page.
 -
Filter your results by type, such as Files, Sites, People, or News.
Find sites you follow
Find sites you follow
The left navigation pane shows SharePoint sites you follow, those you've visited recently, and sites that are spotlighted.
-
Following displays sites you follow, like your team's site or a site from another group you work with.
-
Recent shows any site you've gone to recently.
-
Saved for later lists news articles you've saved to read later.
-
Featured links displays sites Queens wants to showcase.
Create a Site
Create a site
-
Select + Create site on the SharePoint start page.
-
In the wizard:
-
Select whether you'd like to create a Team site or a Communication site.
-
Enter the name (and a description, if you want) for the site.
-
You can select Edit
 and then edit the group email address or site address, if you want.
Important: The only symbols allowed in the site address are underscores, dashes, single quotes, and periods, and can't start or end with a period.
-
Choose a sensitivity level for your site information.
-
Select whether the group will be public or private (if creating a Team site).
-
Select a default language for your site and then click Next.
-
-
In the next pane, enter the owners and members.
-
Select Finish.
A modern SharePoint site is created and ready for use in seconds. If you selected a team site, a Microsoft 365 group is also created.
Congratulations! Your site is now ready to handle sensitive data. It is the responsibility of the site owner to ensure the ongoing maintenance of secure configurations. Regular monitoring of site members is crucial, and any individuals who no longer require access should be promptly removed.
Add a List or Document Library to a site
Add a list or document library to a site
SharePoint document libraries serve as the primary tool for managing files within SharePoint. At Queens, SharePoint is primarily utilized as a campus-wide file sharing service organized by department. By accessing the document library, you can create and edit Microsoft 365 files directly in your browser.
SharePoint Lists are for non-document information that helps you track information and organize work.
1. Open the site that you want to add the list or library to.
-
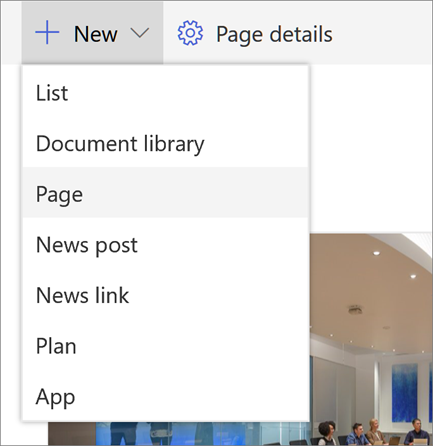
Select New.
-
Select List or Document library.
-
In the Create pane:
-
Type a name for the list or library (and a description, if you want).
-
Select Create.
-
How to use filters
Use filters to modify what you see in a Document Library
-
Go to a list or library that you want to filter.
-
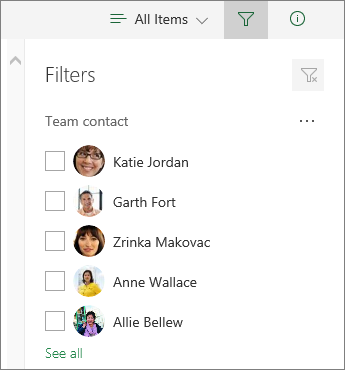
Select Open the filters pane
 .
. -
Select how you want to filter your list or library from the options available.

How to share documents
How to share documents
-
Select the document you want to share.
-
Select Share on the top menu.
-
You have three options:
-
Type the names or email addresses of the people you want to share the document with, and add a message if you'd like. When you're ready, select Send.
-
Select Copy Link to create a direct link to the file that can be shared in an email or IM.
-
Select Outlook to open Outlook on the web and add a link to the file in a new email message.
-
Working with others on the same document
Working with others on the same document
In the Document Library, Open the document for editing in Microsoft 365 for the web.
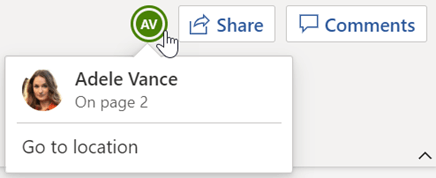
The number of people currently editing the document appears at the top of the document in Office Online.

How to Copy/Move files
How to Copy/Move Files
Here is a step-by-step guide on how to copy and move files in a SharePoint document library:
To Copy Files:
- Navigate to the SharePoint site where the document library is located.
- Locate the file you want to copy and select it by checking the checkbox next to its name.
- In the toolbar at the top of the document library, click on the "Copy to" button or option. It may be represented by an icon like two sheets of paper.
- A side panel or dialog box will appear. Browse for the destination location where you want to copy the file.
- Select the destination folder by clicking on it to highlight it.
- Click on the "Copy" button to initiate the copying process.
- SharePoint will copy the file to the selected destination folder, and a notification or confirmation message will be displayed when the process is complete.
To Move Files:
- Follow steps 1 to 3 from the "Copy Files" section above.
- Instead of clicking on the "Copy to" button, click on the "Move to" button or option in the toolbar. It may be represented by an icon like a folder with an arrow.
- Similar to copying, a side panel or dialog box will appear. Browse for the destination location where you want to move the file.
- Select the destination folder by clicking on it to highlight it.
- Click on the "Move" button to initiate the moving process.
- SharePoint will remove the file from its original location and place it in the selected destination folder. A notification or confirmation message will be displayed once the file has been successfully moved.
Versioning and Restoring Files
Versioning and Restoring Files
-
Access the Recycle Bin: Start by navigating to the SharePoint site where the file was stored. In the site's menu, click on the "Recycle Bin" option. This will take you to the Recycle Bin view, which shows all the deleted items.
-
Select and Restore the Files: In the Recycle Bin, locate the files you want to restore. You can use the search or sorting options to find them more easily. Select the files by checking the checkboxes next to their names.
-
Click on "Restore": Once you have selected the files you wish to restore, click on the "Restore" button or option, usually found in the toolbar or menu at the top of the page. This will initiate the restoration process and return the selected files to their original location in SharePoint.
Add a page to a site
Add a page to a site
-
Open the site that you want to add a page to.

-
Select New.
-
Select Page.
-
Select a template, then select Create page.
-
Type a name of your page, then add any other content you want.
Use web parts to add text, images, and other content.
-
Select Publish when you're ready.
Adding a Web Part to a page
Add a web part to a page
-
In your news post or page, select the plus sign
 where you want to insert content.
 -
Select the web part you want to use: Text, Image, File viewer, Link, …
-
When you have added all the web parts that you want, select Publish.
Modifying Permissions in SharePoint
Modifying Permission Levels for Users and Groups
It is important to note that SharePoint uses Permission Inheritance with its file system. This means that the permissions granted at a higher level, such as a parent folder or site, are automatically applied to the files and folders within it. As an end user, this means that if you have permission to access a parent folder, you will also have the same level of access to the files and folders inside it, unless specifically overridden. This simplifies the management of permissions, as you don't need to individually set permissions for each file or folder within a shared location.
Throughout the lifecycle of a site, it may be necessary to adjust permission levels for users and groups. To modify these levels:
-
On your SharePoint site, Click on the gear icon in the top-right corner for settings and select "Site permissions" from the drop-down menu. For more detailed instructions, refer to the sharing settings at the site level.
-
The panel will display the current permission levels for all team members. Use the drop-down arrow next to each user or group to change their permission level. Users or groups with full control will be listed under site owners. Note: It is important to keep the site owner group as small as possible. Users or groups with edit permission will be listed under site members, while those with read permission will be listed under site visitors.
- Selecting 'Advanced Permission Settings' will provide you with more detailed information.
-
The site owner is responsible for managing edit and read-only permissions for individuals or groups. If a user or group no longer requires access to the site, they can be completely removed from the panel.
Tips for designing your site
Tips for designing your site
When designing a SharePoint site, there are several important factors to consider:
-
Purpose and User Needs: Understand the purpose and goals of the SharePoint site and identify the specific needs of the intended users. Determine if the site will primarily serve as a document repository, collaboration platform, or a combination of both. Consider the target audience, their roles, and the tasks they need to accomplish within the site.
-
Information Architecture: Plan and structure the site's content and navigation to ensure intuitive and efficient user access. Organize document libraries, lists, and pages in a logical hierarchy, and use clear naming conventions to aid discoverability.
-
User Experience and Visual Design: Strive for a clean and user-friendly interface. Ensure consistency in layout, typography, and color schemes across the site.
-
Customization and Branding: Customize the site's appearance to align with Queens brand identity. Utilize SharePoint's branding options to create a cohesive visual experience. Leverage SharePoint's customization capabilities, such as web parts, to tailor the site's functionality.
Comments