
Install and Configure Infomaker
(Note: This article has been updated to reflect the current version of Infomaker 12.5. Please feel free to update any sections that you find to be out of date / incorrect.)
- Navigate to M:\install
- Copy and IM_2019 folder to the desktop
- Go in the Infomaker_2019 folder and double click InfoMaker_2019_setup
- Click Install InfoMaker
- Click Next (directions are a little outdated and need to be updated from here)
- Pick United States from the dropdown menu, select I AGREE, and click Next
- Type in the current user and Queen University of Charlotte as the company name then click Next
- Click Next, then Next again
- Keep the default options on the 'select components' screen, then click Next
- Click ok
- Click Next
- (SQL Anywhere Installation) Select United States, choose 'I accept...', then click Next
- Click Next
- Uncheck the 'Create a desktop shortcut' box and click Install.
- Uncheck all three boxes and click Finish.
- (Infomaker Installation) Click Next
- Click Next
- Click Next
- Click Finish
- Restart your computer when prompted.
Note: The installation may take several minutes to complete all components.
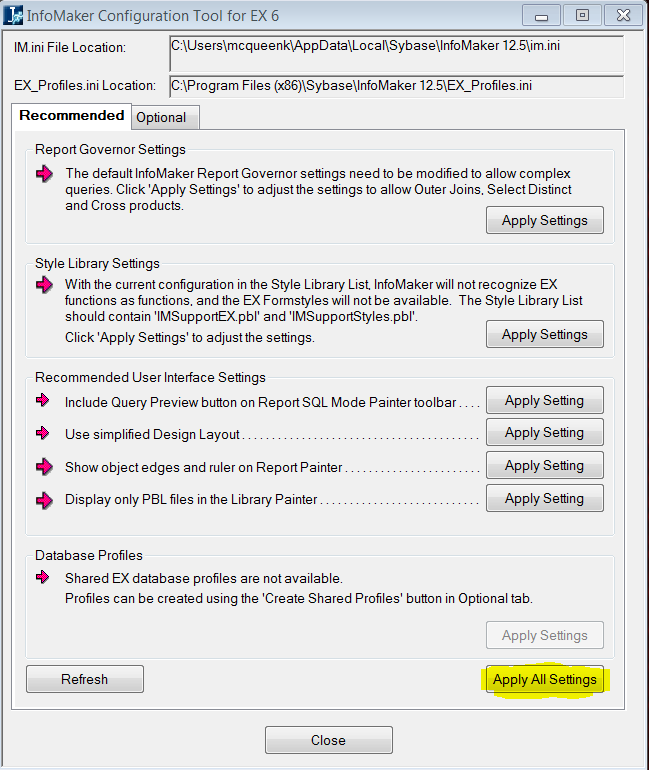
- Open the infomaker configuration tool, You may be presented with a registry error. Click ok.
- Click on ‘apply all settings’ in the window that comes up
- You may get a shared profiles error message. Click ok.
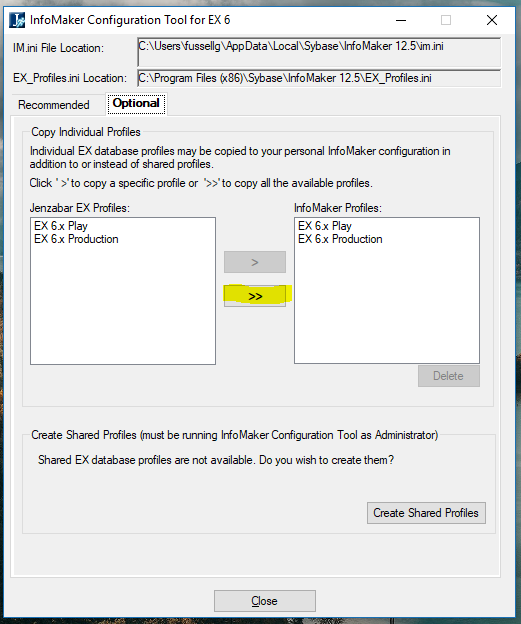
- Click on the 'Optional' tab.
- Click the >> icon to copy the already existing Jenzabar profiles over to the Infomaker profiles box.
- Click Close.
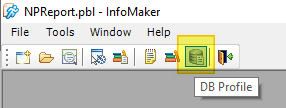
- To confirm that the profiles are set up correctly open infomaker and click on the DB Profile icon.
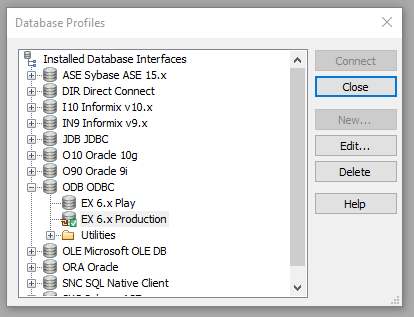
- Once the Database Profiles window opens expand the entry for ODB ODBC. You should see two profiles, one for production and another for play.
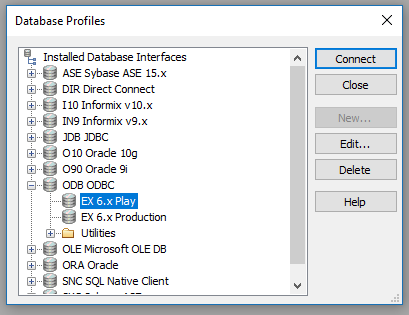
- If you don't see these two entries then re-open the infomaker configuration tool and copy the profiles again as described above.
- Choose one of the profiles and click 'Connect'.
- Check the box for 'Use Trusted Connection' in the popup window and click OK.
- If the connection was successful both windows will close. You can also re-open the Database Profiles screen and look for a green check mark.
- If you receive an error when trying to connect to either database that means that the user has not been set up with the proper infomaker permissions and a ticket needs to be sent to the ES team.
To attach the .pbl
- (from within infomaker) click ‘file’, ‘select library’
- Most .pbls are located under M:\latest version folder\Custom
- Select the one you want and click ok. This will set it as your working library
- Note: You can only have one working library at a time.
Comments